Make your own fresh herb tincture

April 16, 2011

I have long wanted to include some ‘practical’ instruction in my blog for the all important preparations that all herbalists and family healers use on a regular basis. This post will be devoted to a simple alcohol extract of a botanical, called a “tincture”. The extracting can actually be done with cider vinegar or glycerin, alternatively, though alcohol does work best. It is important to note that some herbs are better taken as infusions or decoctions, particularly if the vitamin content is what one is after (i.e. nettles).  It is also important to note that some herbs are absolutely best taken as a *fresh* herb tincture rather than a *dried* herb tincture. This post is for making tinctures from *fresh* herbs. Some examples of herbs that should be tinctured fresh are turmeric rhizome, ginger rhizome, St. John’s wort, Milky oat tops, and skullcap. Other herbs I prefer to tincture fresh are motherwort and tulsi.

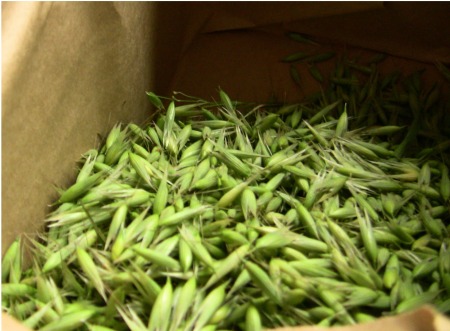
Oat Tops in the Milky Stage

Oat Tops in the Milky Stage

Step 1:

Organize the necessary container for tincturing. It should be big enough to hold all the herb you would like to tincture. There should not be a lot of excess room in the jar, however.

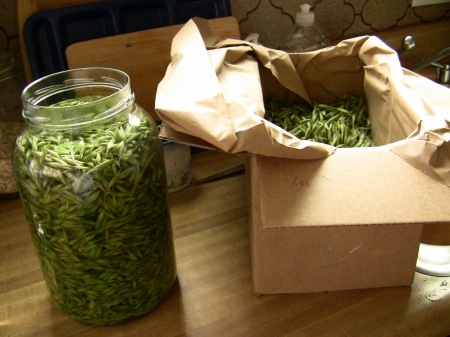
Jar and herbs for tincturing

Step 2:

Put the herbs in a glass jar. I have a gallon sized glass jar here and I’m using fresh oat tops in the milky stage, shipped to me from Pacific Botanicals organic farm in Oregon.

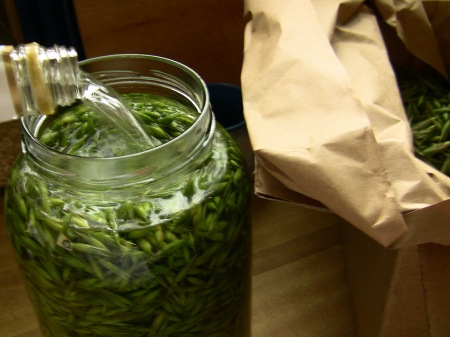
pouring grain alcohol onto the herbs

Step 3:

After the herbs are in the jar, pour 95% (190 proof) grain alcohol over the fresh herbs. The percentage of alcohol you use is probably the most important part of tincturing aside from the quality of the herbs used. The percentage of alcohol for fresh herbs shouldn’t dip below 50% or the tincture will probably spoil. Because fresh herbs contain a lot of water already, you can assume that just by using fresh herb, you’ll be diluting the % of alcohol in the preparation. So, if you use (40%) 80 proof vodka, for instance, you may end up with a tincture that is only 20% alcohol, and that tincture would certainly spoil. Many herbalists use 100 proof (50%) vodka and have success, even with fresh herbs. I prefer to use a higher proof for fresh. Using 100 proof (50%) vodka for *dried* herbs is certainly okay, though more complicated formulas are used by professional herbalists.  Keep in mind that some herbs require glycerin at about 10%, including milk thistle seed.

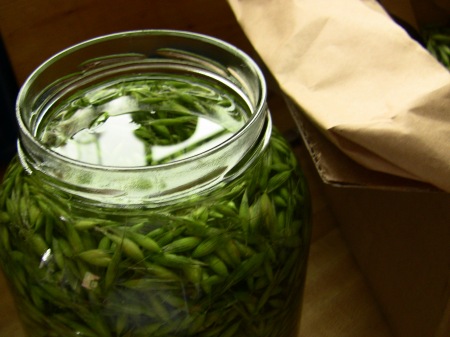
So, you pour the alcohol over the herbs and fill the jar to the top. Leave about 1/2 – 1 inch between the alcohol and the rim of the jar. Try to make sure all of the herbs are under the liquid.

tinctured oat tops
Step 4:

Use a chopstick or spoon to press the herb down and stir in order to release any air bubbles that may be trapped in the jar.

Step 5:

Cap the jar. I often like to put a piece of wax paper between the rim and lid so that the lid doesn’t ‘stick’ to the jar. It’s not that this is really a problem, because you can run it under hot water, but it just makes it easier.

Step 6:

Label the jar with the herb, date, and percentage of alcohol. Store in a cool/dark place and allow to do its tincturing  magic for 4 – 6 weeks. You can really leave it for longer if you don’t get to it in that time frame.  I have left herbs in 180 proof alcohol for a *year* and it doesn’t go bad because of the high alcohol content. Sometimes I do up to 3 gallons at a time, so I don’t always decant everything right away!

Step 7:

When you decant, strain the herbs out and compost them after squeezing the alcohol out of them. You can wring out the herbs with a thin, clean dishcloth or cheesecloth. There are also professional herb presses that are available for just this purpose. The herbs will often become quite dessicated, actually, so sometimes it is incredibly easy to extract as much alcohol as you are going to!

Be sure to label your decanted tinctures with the Date and the Herb, as well as the alcohol used. Keep in mind that the % of alcohol is no longer 95%!!! Though it’s not easy to exactly determine, it’s probably closer to 50%, depending on the herb used.

Resources:

Gladstar, Rosemary, Herbal Healing for Women, 1993.
Weed, Susun, Healing Wise, 1989.
Tierra, Michael, The Way of Herbs 1998
Hoffman, David, Medical Herbalism, 2003.
Tilgner, Sharol, Herbal Medicine, 1999.

Good luck with your first tincture. Feel free to comment below if you have questions!
My tinctures can be found on my Etsy site.
Horseradish (Armoacia Rusticana): International Herb of 2011

February 18, 2011

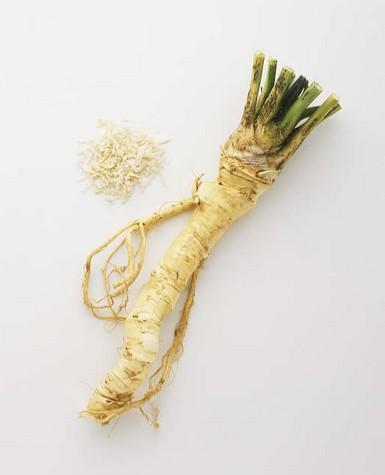
Horseradish Horseradish? That seems to have been everyone’s response to the choice of International Herb of 2011, despite this herb’s long use as a medicinal herb. Not only is horseradish’s spicy, peppery taste a flavor booster, but it has the ability to clear the sinuses (you know what I am talking about!) and also has a range of antibacterial activity, which makes it additionally useful for infections. A powerful diuretic, horseradish has been used throughout the centuries to treat kidney stones and similar problems. Not surprisingly, horseradish is also great for indigestion and putrefaction in the digestive tract. As an expectorant, horseradish is helpful with lung problems, including asthma and coughs, and is additionally useful for arthritis. To add to the laundry list of uses, horseradish can be used as a skin treatment to remove blemishes and lighten discoloration; it is a successful vermifuge for expelling worms and parasites; it’s an immune stimulant that can strengthen a worn down system and as an anti-oxidant, helps counter the negative effects of pollution and stress; it’s also a detoxifier for the liver and spleen. It can even be held to the nose of a nursing baby who can’t nurse well because of a stuffy nose (the fumes will be strong for the baby, who may cry for a minute because of it, but it’s effective and safe).

For a sinus remedy, the famous herbalist, Dr. Christopher, recommends the following: “Start with 1/4 teaspoon of the freshly grated root and hold it in your mouth until all the taste is gone. It will immediately start cutting the mucus loose from the sinuses to drain down the throat. This will relieve the pressure in your sinuses and help clear infection.” Incidentally, the grated root is apparently sweeter and milder when fresh than when purchased from the store.

I think horseradish is perhaps best known as one of the five bitter herbs (along with coriander, horehound, lettuce, and nettle) eaten historically during the feast of the Passover Seder.

I’m chagrined to admit that despite the obvious strength of horseradish’s energy, I haven’t used this herb very much myself, and could also do to incorporate it into my diet more often. Herb Companion has posted a number of culinary recipes for the use of horseradish, including those listed here. Leek and Celery Root Gratin with Horseradish looks really intriguing, and just like I enjoy mashed potatoes with dijon or whole seed mustard, I’m sure I’d love the peppery addition of horseradish to a creamy potato dish.


Featured Seller: Organic Quilt Company

December 1, 2010
organic cotton burp cloths

organic cotton burp cloths

Wow! It’s been ages since I last featured a seller from the handmade community. In fact, it was nearly a year ago. I guess it is around the holiday that we hone in on the best and brightest artisans out there.

Becky Stone of Organic Quilt Company

Becky Stone of Organic Quilt Company

I probably first saw the fine work of Becky Stone on Etsy‘s front page, as in May of 2009, she was a featured Etsy seller. Her beautifully photographed works consist of organic cotton baby blankets, burp cloths, hand crafted quilts, infant hats, and bibs, all found in her etsy store, Organic Quilt Company. The fabrics are absolutely beautiful and certainly drew me to her shop instantly to peruse for gifts. My brother’s baby Maya and a  friend’s baby Samantha are two recent recipients of her gorgeous creations. Just look at this beautiful Woodland Friends blanket below (Samantha snagged that):

Woodland Friends Baby Blanket

Woodland Friends baby blanket

Passionate about her quilting addiction, Becky lives with her husband, three kids, and two fat cats in Hudson, an idyllic small town just outside of Montreal, Canada. Color and fabric, “in all its tactile glory”, have always been the main sources of inspiration for her projects. Becky tells me that she began quilting fifteen years ago because she really wanted to own a quilt and couldn’t afford to buy one. Her first attempt was a huge, very difficult quilt that she did finish, but she claims that “‘primitive’ would be a very grand compliment for it.” Fortunately, Becky stuck with it to create the beautiful pieces she designs today.

organic cotton blankets

organic cotton blankets

When I asked Becky about why she chose to work with organic materials, she said she had become concerned with the “chemicals devoured by the textile industry, and the quilting industry in particular.” Wrapping her three wee bairns in chemically-coated textiles at bed time was simply not appealing!  Becky chose to focus on baby quilts because, as I well know (!), everyone loves to buy beautiful things for babies. Here, here! It was a marriage made in heaven: organic fabrics and baby quilts. In addition, a baby quilt would provide a more affordable price point than larger, full-sized quilts, as they are already such labor intensive products.

handmade organic cotton quilt

organic cotton quilt

Shipping times from Canada are around two weeks, so you are *just* in time to order for the holidays. Pop on over to Organic Quilt Company and buy something beautiful for a baby you love.  You can mix and match lots of options to create the perfect bundle of organic goodness.

organic infant knot hat

infant knotty hat

Other posts you might enjoy:
Looking for something unique? One of a Kind Art
Featured Seller: Motley Mutton
Eco Head ware for the Wee Ones


Herbal Remedies Tip #10: Tension Headaches

October 28, 2010
Lavender bush

"Lavender": Mooseyscountrygarden.com

Sigh. Tension headaches. I know, I know…in some respects, tension headaches aren’t quite as bad as true migraines (that nausea thing! ugh!), but at the end of the day, if your tension headache is bad enough, it can render you incapacitated. When I was in graduate school, I began to develop severe tension headaches. I ended up in the ER one night (total waste of 9 hours on an icy, snowy, Montreal night) and found that allopathic medicine has just about nothing to offer someone suffering from this condition. The solution for me? Chiropractic medicine. I mean it. Total godsend for me. Now, if you feel a tension headache coming on or you have a mild tension headache that doesn’t necessarily require the re-adjustment of your bones, herbal therapies can help. Think “calming” to begin with. Lavender essential oil (as aromatherapy) can be helpful in getting you to involuntarily relax! Never a bad thing. You can also try the tea below, which has ingredients that can ease tension and pain. Skullcap is an herb of particular import, as it is specific to anxiety, particularly when clenching the muscles, ticks, palsies, or other physical outcomes of anxiety/tension are involved. You can take this herb as a tincture, but be sure the tincture is made from the *fresh* herb and not dried.

Tension-ease Infusion

1 part skullcap
1 part sage
1 part peppermint
1/4 part lavender

Infuse 1 – 2 tsp of the above blend of dried herbs in one cup boiling water for 10-15 minutes minimum. A longer infusion results in a stronger tasting brew with more medicinal effect, but the weaker infusion is perfectly fine & therapeutic. Feel free to add honey and/or lemon to taste!


Home Spa Treatment #1 – Treat those eyes

March 4, 2010
Cucumber

thanks to iChaz on flickr

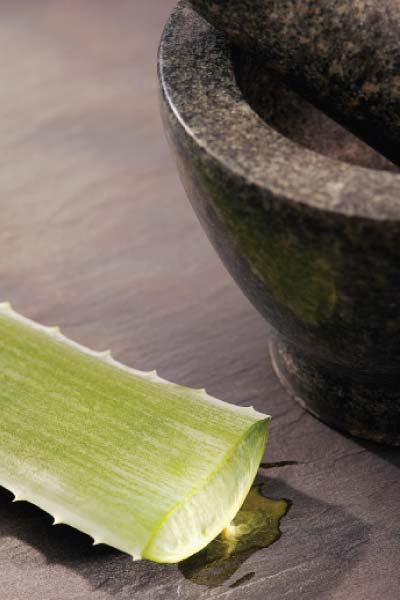
"Aloe" thanks to Herb Companion

"Aloe" thanks to Herb Companion

I’ve been offering you some Herbal Remedies quick tips, but I’d like to start a new series of Home Spa tips focusing on different treatments you can do at home for your own private spa experience.  Let’s start with those alluring eyes of ours that communicate so very much.

We all know by now why there are eye serums & creams on the market. First, we live insane lives here in the United States, where the response “Busy” has replaced “Fine” when we are asked how we are doing. Second, we don’t get enough sleep. Third, sun damage. Finally, despite our greatest efforts, we are aging, and here in America, we don’t tend to like that. Despite the truth that many skin care product claims might be a bunch of B.S., there is actually some truth to ingredients that attest to reduce puffiness, smooth out wrinkles, and brighten our peepers (or at least the skin around them).

These ingredients, when present in your eye care product, can do a lot to remedy your eye area issues: Retinol (increases collagen production), forms of zinc (may increase elastin production), cucumber extract (anti-inflammatory), chamomile extract (anti-inflammatory), caffeine (diuretic – so it reduces puffiness & seems to “lift” eye tissue), Vit C (decreases melanin production, treating dark circles), and Vit K (helps break down pigment particles in blood, decreasing dark circles).  Extra-emollient oils can also help keep that fragile skin elastic and supple, reducing wrinkles in the long-term and helping repair sun damage. That sun damage part can also be mitigated by anti-oxidants by reducing the ravage caused by free radicals.

Weren’t you wondering why I include green tea (antioxidant, vt C, and caffeine), Vit C, and chamomile in my popular Eye Potion? Don’t worry – I’m making a fresh batch next week. But I’m here to tell you about home remedies you can do yourself! Fortunately, there is a lot you can do yourself at home to do something for your poor tired eyes.

Eye cream

Lilith's eye potion

Tea Bag eye packs
— seriously! That concentrated tea contains caffeine that is proven to reduce puffiness. Leave teabags on eyes for 10 minutes and make sure to use cool water as hot water may burn and can help dry out eyes. Use a caffeinated tea with rosehips and you have a good amount of Vit C in there too. One with green tea, chamomile, and rosehips and you have an eye tea powerhouse!  Hey…maybe I should make these.

Cucumber eye packs. Yeah cucumber! We all know that Cool as a Cucumber says it all. And cucumber truly does reduce puffiness and inflammation, calming the eye area (and the rest of the skin too!). You can use cucumber distillates, mists, or slices of the vegetable placed over your eyes for 5-10 minutes.

Eye Serum. You can create a special oil of emollient oils such as avocado, coconut, shea, meadowfoam seed, hemp seed , evening primrose, and rosehip seed oil. Extra powerhouse ingredients include carrot oil, blueberry seed oil, seabuckthorne berry oil, and essential oils or CO2 extracts of Calendula, blue chamomile, and helicrysium.

Eye Potion. This is a simple Cocoa Butter & Coconut Oil recipe from Herb Companion. You need only two ingredients and you don’t need to use preservatives because there is no hydrous, or water, component. Super rich and long-lasting.

Cooling Cucumber Eye Gel.  I love this recipe from Herb Companion and remember when I first noted it when it appeared in print last year. This is a once & done spa treatment, meaning that it won’t preserve longer than a few days if kept in the fridge. But considering the ingredients, including fresh cucumber juice and aloe vera, it sounds like a great treatment!


Herbal Remedies Tip #9 – How to make a mustard plaster for coughs and bronchitis

January 21, 2010

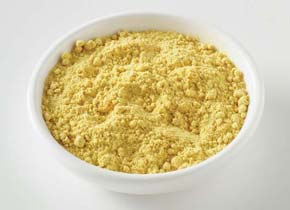
mustard powder A mustard plaster? What the heck is that, you may be wondering…and even if I knew (your mind continues), wouldn’t it be messy and probably ineffective anyway? Well, I don’t know. But I like the idea of it, and I’m going to try it too! You can use a mustard plaster to bring warmth and circulation to the chest when battling persistent coughs or bronchitis. No one in my house has had a persistent cough or bronchitis in as long as my memory can stretch, but you never know. And the herbalists I trust the most, including MD Aviva Jill Romm, certainly advocate their use. As Dr. Romm indicates, the increased blood flow reduces coughing and speeds healing (Romm 2003). And yes, this is perfectly fine to use with children over three years of age. In fact, that’s who she suggests it be used for, though of course it’s useful for adults too.The only caveat is that mustard plasters must be used with those who have the ability to communicate with you if it becomes uncomfortable, so the individual must be awake and able to communicate clearly.

Aviva states that the process may seem elaborate or complicated, but after doing it once it will be simple. The relief your child will get will make it all worthwhile.

Supplies:
1/4 cup dried mustard
2 cotton kitchen towels
large bath towel
hot tap water
large bowl
warm, wet washcloth
salve or petroleum jelly

Instructions:
1. Lay out one kitchen towel on a flat surface. Spread the mustard powder onto the towel, leaving a 1 inch border around the edge uncovered. Next, fold the bottom border upward over the edge of the powder to keep the powder from following out. Place the second towel over the first one, and starting from each of the short edges, roll the edges to the center, forming a scroll.
2. Place the scroll in the bowl and cover it wiht very hot water. Bring the bowl and all the other supplies into your child’s room. Be certain there are no drafts in the room.
3. Place the large bath towel open on a pillow, take off the child’s shirt, and liberally apply the salve or petroleum jelly onto the nipples to protect them from getting blistered or burned.
4. Thoroughly wring the water out of the mustard filled towel when it is cool enough to be handled. Unroll the mustard bandage to the folded edge. With teh folded edge at the bottom, place against the child’s chest and as far aroudn the back as it will reach. The child should quickly lie back on the bath towel, which you then wrap over the plaster. Cover the child with blankets.
5. To prevent burns, remove the plaster immediately when the child says it feels hot or is stinging. This may be after only a few minutes. After removing the plaster, wash the area with the damp washcloth and cover the child with blankets to prevent chill. Never leave the plaster on a child under the age of eight for more than 5 minutes. Adults can tolerate it for a maximum of 20 minutes. Do not repeat more than twice a day for two days, and discontinue if the area becomes red. Never leave a child unattended while the plaster is on.

Okay….so try it out and please, please, please…tell me how it goes!

Ref: Romm, Aviva Jill (2003) Naturally Healthy Babies and Children: A Commonsense Guide to Herbal Remedies, Nutrition, and HealthNaturally Healthy Babies and Children: A commonsense guide to Herbal Remedies, Nutrition, and Health. Ten Speed Press: Berkeley.


Herbal Remedies Tip #8 – Herbal Hangover Relief

January 7, 2010

You might have needed this post most on New Year’s Day (though I actually went to bed at 11:50 if that tells you how exciting the eve of 2010 was for me this year), but hey – better late than never. Now, my love of nutrition and care of the body prompts me to admonish, “look now, people – metabolic toxins (i.e. alcohol) is not good for the body, and you know it!”, but let’s be fair. There are times when I get into a really good bottle of wine and can’t be stopped. I also lived in Ireland off and on for at least a year and a half, so I have sympathy for the human experience of the fabled hangover.

Hangovers, as most know, feel like a combination of headache, sometimes nausea, fuzzy head, maybe a bit of depression, certainly a lot of lethargy. Most of these are connected to an ‘overloaded’ liver, the organ responsible for processing the metabolic toxins from alcohol. Helping a hangover usually includes helping your liver. Bitter herbs stimulate the liver to release bile, aiding digestion and helping to detoxify the poor, overtaxed organ. You might try drinking some water with freshly squeezed lemon before bed and when you wake up in the morning to help the liver.

Morning-After Tea (no, not morning after *that*, just morning after lots of drink
1 part Vervain (bitter herb)
1 part Lavender (relaxing, calming, aids digesting, analgesic (pain relief)
1/2 part white willow bark (analgesic w/ similar compounds to asprin)
1/2 part burdock root (bitter root, liver tonic, nutritive)
* each “part” can be a tsp or 1 oz depending on how much of a blend you want to make. Try it as a cup first, though
Add 1 pint (2.5 cups) boiling water to a 2 tsp and steep (covered!) for a minimum of 10 min. Strain and sweeten with honey and/or add lemon if desired. Sip throughout the day until you start to feel better. It is a little bitter, but hey – you did it to your liver, after all, and this is what you need now!


Home Spa: Beauty Blossom Facial – PART I

March 18, 2009

facial_steam_loose_3Do you dream about that fabulous facial you had…oh, once upon a time? Most of us can’t afford a facial these days, especially at $50-$150 for an hour long treatment. The good news is that anyone can do an incredibly luxurious, spa quality facial in one’s own home! A facial is just what we need this time of year ~~ it will quickly revitalize skin, give you a lovely glow, tighten pores and smooth the texture of your skin. There are so many great ways to accomplish a beautiful facial and scads of recipes out there to follow. In this post I am going to give you the outline of the “perfect” facial, including Herbal Steam, Clay & Herb mask, & Simple Home Spa Toner.

Take the time and effort to do an herbal facial steam. You can check out my facial steams for drier or oiler skin types in my etsy shop, and that will give you more specifics about what different herbs will do for your skin, but I would also encourage you to put together an herbal steam from herbs you might have handy or would be able to obtain fairly easily. Try this recipe below for STEP ONE of your facial in order to open your pores, deeeeply cleanse your skin in the most gentle manner available, and allow the herbs to do their good work on your facial tissue. It’s a quiet, meditative practice and really necessitates you taking some time out just for yourself!

STEP ONE: Herbal Facial Steam.

Gather together small amounts of herbs rich in volitile oils that smell heavenly and will also greatly benefit your skin. Some examples are mints (spearmint, lemon balm), scented geraniums, chamomile, lavender, lemongrass, orange peel, or even thyme or rosemary.  Citrus-smelling herbs are often useful for oily or acne prone skin, and indespensible herbs like thyme and rosemary have some antiseptic properties and so can be additionally helpful for troubled skin. In addition, you will want to use an emollient (skin soothing) herb and a healing herb in order to balance any skin issues that may exist. Comfrey root is both emollient and healing, so this beneficial root shows up in most of my steams. You can always try a bit of licorice root (emollient) along with calendula blossoms (healing) if they are on hand.

Beauty Blossom Herbal Steam:
1. 1 tsp rose petals (aromatic, astringent)
2. 1 tsp chamomile flowers (anti-inflammatory, calming)
3. 1 tsp hybiscus (emollient)
4. 1 tsp calendula blossoms (healing)

Directions: combine herbs and place in a non-metal pot, fill with 2 cups of filtered water and bring to a simmer on the stove. Cover tightly and allow to simmer for 10-15 minutes. Remove the pot from the heat and find a comfortable spot to sit. Put your face over the steam and drape a towel over your head to trap the steam. Move your face from side to side and steam it for 10 minutes. When the water begins to cool, blow into the steam to direct it back into your face, where you can attempt to target more troubled areas. You can bring the water back to a simmer and do it again if you’d like!

A facial steam is the ideal preparation for a home spa clay & herb facial mask, which should always be applied to a very clean face. Part II of my home spa facial series will explain how to make your own facial mask at home! Stay tuned…


DIY ~ Herbal Remedies for the Cold Season Part I

February 20, 2009
Ginger Root

Ginger Root

Yes, we are smack dab in the middle of cold and flu season and for those of us with toddlers in day care (a-hem), herbal remedies seem to be a constant part of life in the wintertime! You actually never need to touch the chemical laden and possibly detrimental cold & flu symptomatic remedies on the counters of your local pharmacy. Instead, turn to the natural gifts of nature, for far more effective, immune-building resistance and treatment.

PREVENTION:
Astragalus root is a chinese herb that has been long used as an immune tonic. Michael Tierra recommends making an herbal syrup from astragalus for those with compromised immune systems, but I often just add astragalus regularly to decoctions or even to soup stocks for an added immune boost! Astragalus is not an herb to use once a cold has already set in.

Adaptogens are a wonderful gift to us and are used in many cultures as tonics for longevity and resilience throughout life. They help to balance our systems and create better resistance to stress, including stress-induced colds and flus. Regular use of an adaptogen is recommended for anyone living in our stressful, postmodern, multi-tasking world! Examples of adaptogens include Siberian Ginseng (Eleuthero), Asian Ginseng, Ashwaghanda, and Rhodiola Root. You should consult with an herbalist or herbally-savy naturopath to assess which adaptogen is best for you. That said, Siberian Ginseng seems a good all-around adaptogen that is often used as an energy tonic for athletes.

TREATMENT:
Echinacea is still the superior choice in cold and flu treatment. There have been studies suggesting a lack of effectiveness, but the dosages and herb formulations in those clinical studies were not therapeutic, more often than not. I still swear by the stuff! As with many (if not most) herbs, echinacea’s clinical power is not isolated to one ingredient, but rather, its whole chemical make-up contributes to its immune-boosting power. The action of this wonderful herb is quite different from allopathic antibiotics and even other antibiotic herbs such as Golden Seal. Echinacea actually vitalizes the immune system rather than attacking the virus directly, and thus assists the lymph, adrenal and thymus glands in their immune activity. It is also a fine fever herb and does not interfere with the needed (slight) elevation in temperature, as bacteria and viruses cannot survive above 100 degrees, but keeps the fever low enough to prevent convulsions (Susun Weed, Wise Woman Herbal for the Childbearing Year, 1986).

Echinacea

Echinacea

Echinacea does appear to have some preventative power, especially when used in the early stages (you feel that throat tickle, perhaps, or you’re starting to feel run down), but it also shortens the length of a cold and lessens the severity. Echinacea is better taken in tincture than capsule form, but I also like to make a strong herbal syrup from a decoction of echinacea, chapparal, ginger, and thyme to really pack a punch to that mean old cold. I’ll post DIY instructions for making an herbal syrup at some stage soon. The important thing is taking ENOUGH of the stuff. Most people under-dose. At the first signs of a cold, you may need to take a dropperful of the tincture four to six times a day. This is equivelant to 1-2g dried root per day. Take up to nine 300-400mg capsules per day. If you are taking the tincture, you should have a transitory numbing, tingly sort of feeling on your tongue. For babies and children, put 10 drops of echinacea in a four oz. bottle/cup of water or juice. Allow your child to drink as desired and this will help keep a fever in bounds. Even the newest of newborn babies old will benefit from the breastmilk from a breastfeeding mother taking echinacea infusions or tincture.

Garlic and Onions are potent anti-virals in an of themselves. Fresh garlic is much more potent than cooked or roasted garlic and one way to get around popping a whole clove in your mouth is to dice up a few cloves, add to olive oil and dip bread in the oil & garlic. You might even add a dash of cider vinegar for good measure! It’s yummy AND it’ll treat that cold. In addition, the old adage about chicken soup seems to be linked more to the onions and garlic simmered in that warm vegetable or chicken stock than to the chicken itself. Not only are the onions and garlic antiviral, but viruses don’t survive at hot temperatures and drinking hot broths, soups, and teas can really inhibit viral replication, along with keeping you well hydrated. I’ve also heard of wise women making strong garlic teas from fresh cloves. One half cup of this stuff and you could really knock that cold back a couple steps, or if taken early on, might deter it completely.

Ginger and Lemon infusions should not be understated as a helpful treatment strategy. Not only is the hot liquid good to take in, but ginger is warming and can help heat the body up, helping you to ‘sweat it out’. Herbalist Michael Tierra recommends taking the hot ginger tea (fresh or dry ginger root infused for at least ten minutes) after a hot bath and then piling on the blankets. Heating up the body temperature helps prevent viral replication and can really do a number on the little suckers. That’s why our immune response is often to have a fever! Viruses simply cannot survive in body temps over 101 degrees. You need only get concerned when your temp gets to 102 or higher or that they persist for more than a couple of days. Lemon is very rich in infection-fighting vitamin C and is also a fever cooler when the temp rises.

Elder Berry and Flower : Elder, herbalist Susun Weed tells us, seems to help the body regulate temperature, and when those lovely white blossoms are tinctured, can provide a superior remedy for treating infants’ tinctures, as well as our own. It reduces frighteningly high fevers without fail and doesn’t have the detrimental effect on kidneys and livers as commercial fever-reducers (advil, tylenol) do. Put one drop per pound of body weight under the tongue (for infants and adults alike) and thoe dose can be repeated as often as needed. It is completely harmless. The fever usually begins to decrease within a few hours of the first dose. (Elder can also be administered by dropper while breastfeeding).

RECIPES for therapeutic foods & herbal infusions to follow in Part II!

SOURCES:
Pacific Botanicals
Mountain Rose Herbs