Make your own Herbal Wines

July 18, 2011

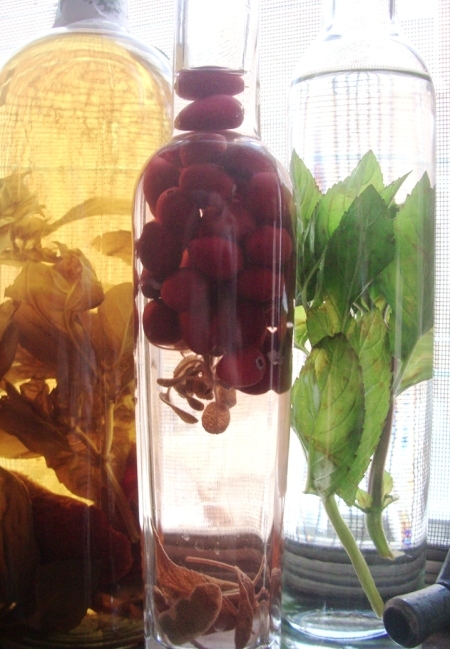
herb Infused wine
Herbal wines
date back thousands of years. Egyptian wine jars have been found with residues of herbs and resins. It makes sense, as we now know that alcohol breaks down the medicinal constituents of plants, making it more bio-available to the body. That’s why we make alcohol extracts as herbal tinctures to deliver botanical chemicals to our body. The famous 12th century German mystic, Hildegard of Bingen, recommended herbal wines such as lungwort wine for emphysema, honey-parsley wine for heart pain, and unsweetened lavender wine for congested liver.

Bitters infused in alcohol have been used in Europe for several hundred years. They usually contain bitter herbs that help with digestion by stimulating bile juices. Bitters have also been traditioanlly added to beer for the same reason.  Angostura Bitters are a famous member of this category and are well-used in hundres of cocktails for a splash of complexity, and to this day only 5 people in the world know the well-kept secret of the herbs used in this special recipe. Though this mexture was hoped to help soldiers in WWI suffering from severe fevers and digestive disorders, it now serves to enliven many of our most special happy hour drinks today. Bitters are usually made with alcohols other than wines, but it might be fun to experiment with bitter herbs when making a more medicinal wine.

There are lots of super tastey concoctions that can be made in your own kitchen. I often make herbal simple syrups to add to gin or vodka drinks for something herbaceous, but it’s really fun to go directly to the source and create an alcoholic beverage that is lively and compex all on its own! This is why going the herbal wine route is worthwhile. Most people can afford a decent white or red wine to start with.

Making Herbal Wines

1. Place Herbs in a bottle (1 oz herbs to 1 pint wine)
2. Pour wine over herbs to fill the bottle (generally a ‘sweeter’ wine w/ about 12% alcohol)
3. Cap tightly and shake well
4. Store in a cool, dark place
5. Shake well every day for 2 weeks
6. Strain herbs.
7. Add sugar or honey to taste (optional), particularly for liqueurs
8. Some liqueurs need maturation time, in which case you might wait a month or more.
NOTE: herbal wines should last about a year. Herbal liqueurs may last longer.

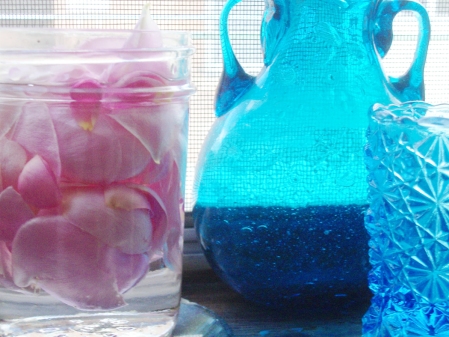
rose infused vodka Rose Petal Wine
(Medicinal Uses: for headaches, heart disease, stomach pain & fever)
600 g rose petals (Rugosa preferred), dried and unsprayed
10 liters combination grape juice and young wine OR all young wine

1. Tie rose petals in a small bag & place in a container with the liquids
2. Infuse in a dark place (covered) for 3 months
3. Filter, pour into a sterilized bottle or jar and store again.

Ref: adapted from an article in The Herb Quarterly by Barbara MacPherson.


Make your own luscious lip balms

May 25, 2011

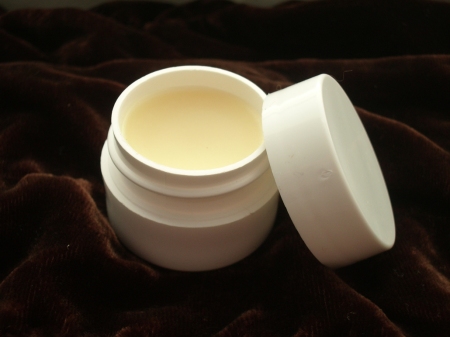
lip balm

Making lip balms, or any kind of balm or salve, is often the first step towards making your own skin care products. In my study of herbal medicine, I know I started with making herb-infused oils and then salves. Lip balm is basically the same thing, though you can choose whether or not you want to start with a homemade herb-infused oil or just a neutral oil such as olive oil. Adding essential oils such as peppermint or sweet orange provide a nice scent and in the case of peppermint, a minty tingle. Lavender essential oil is a wonderful addition, as the heavenly fragrance floats from your lips right into your nose! I generally use beeswax in my lip balms, but a vegan alternative is carnuba wax, with which I’ve had good success, though you may need to add a tiny bit more wax. I recently created a vegan lip balm scented with orange and basil – herbacious goodness!

Basic Lip Balm Version 1:
2 tsps neutral oil (jojoba, olive, sunflower, safflower, sweet almond, apricot kernel, etc)
1/2 tsp beeswax beads (or grated beeswax)

Basic Lip Balm Version 2: (if you want a richer balm)
1 tsp neutral oil
1 tsp coconut oil (saturated)
1/2 tsp beeswax beads (or grated beeswax)

Step 1: Use a double boiler to very gently heat ingredients stovetop. Becuase of the small amounts, the wax should melt very quickly.
Step 2: Remove immediately from the heat when melted.

Variations & Additions:
a. a few drops of essential oil (lavender, sweet orange, peppermint, spearmint). Don’t add too much! Try 5 drops.
b. If desired, add a few drops of skin ‘superfood’ such as blueberry seed oil or carrot seed oil.
c. a few drops of Vitamin E oil to protect the balm from rancidity. This is not necessary but suggested, if possible.
d. if you love vanilla, you could add 1/8 tsp vanilla extract for a vanilla taste. As an alcohol extract, however, it may not blend perfectly with the oils.
e. to stain your lips a berry color, try adding 1/8 – 1 tsp beet-root powder to your desired strength. It may not mix perfectly when stirring it in to the melted oils, but it will emulsfiy when cooled.

Step 3: pour into a clean, dry container, such as a 1 oz balm tin. You can buy balm tins individually from packaging suppliers. You could also recycle old lipstick tubes or even film canisters (if you still have any around!) When your container is empty, wash it out, dry completely, and make your balm recipe again. Balms usually last quite a while.

If you are looking to make your balm with an herb-infused oil, check out my process for making infused oils in a post for Herb Companion. Some herbs that would be great in a lip balm are as follows:
calendula (healing)
chamomile (anti-inflammatory & aromatic)
lavender (aromatic, anodyne)
plantain leaf (healing)
comfrey leaf or root (healing)
yarrow (healing)
thyme (anti-septic)
violet (soothing; emollient)
marshmallow root (emollient)
rose (aromatic & tonifying)

Share your favorite lip balm combination!
Some of mine are my Lavender & Green Tea Lip Salve and my Mint & Lemon Balm Lip Salve, which has a menthol-induced tingle. I love that 🙂


Make your own fresh herb tincture

April 16, 2011

I have long wanted to include some ‘practical’ instruction in my blog for the all important preparations that all herbalists and family healers use on a regular basis. This post will be devoted to a simple alcohol extract of a botanical, called a “tincture”. The extracting can actually be done with cider vinegar or glycerin, alternatively, though alcohol does work best. It is important to note that some herbs are better taken as infusions or decoctions, particularly if the vitamin content is what one is after (i.e. nettles).  It is also important to note that some herbs are absolutely best taken as a *fresh* herb tincture rather than a *dried* herb tincture. This post is for making tinctures from *fresh* herbs. Some examples of herbs that should be tinctured fresh are turmeric rhizome, ginger rhizome, St. John’s wort, Milky oat tops, and skullcap. Other herbs I prefer to tincture fresh are motherwort and tulsi.

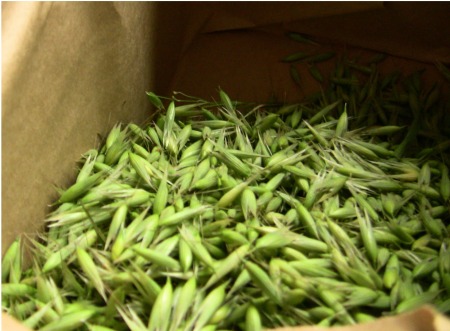
Oat Tops in the Milky Stage

Oat Tops in the Milky Stage

Step 1:

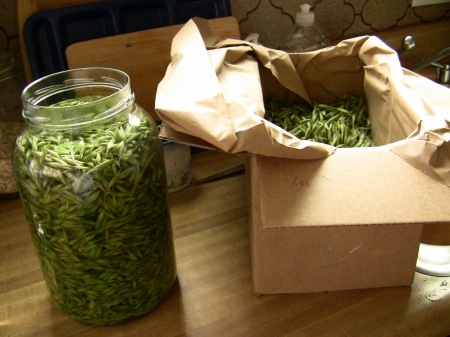
Organize the necessary container for tincturing. It should be big enough to hold all the herb you would like to tincture. There should not be a lot of excess room in the jar, however.

Jar and herbs for tincturing

Step 2:

Put the herbs in a glass jar. I have a gallon sized glass jar here and I’m using fresh oat tops in the milky stage, shipped to me from Pacific Botanicals organic farm in Oregon.

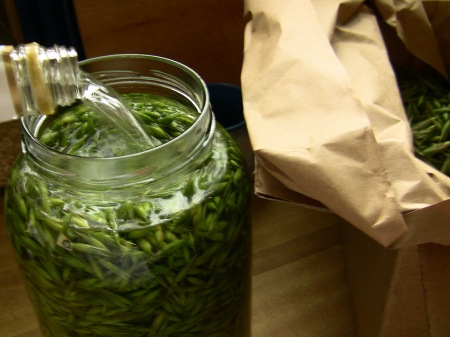
pouring grain alcohol onto the herbs

Step 3:

After the herbs are in the jar, pour 95% (190 proof) grain alcohol over the fresh herbs. The percentage of alcohol you use is probably the most important part of tincturing aside from the quality of the herbs used. The percentage of alcohol for fresh herbs shouldn’t dip below 50% or the tincture will probably spoil. Because fresh herbs contain a lot of water already, you can assume that just by using fresh herb, you’ll be diluting the % of alcohol in the preparation. So, if you use (40%) 80 proof vodka, for instance, you may end up with a tincture that is only 20% alcohol, and that tincture would certainly spoil. Many herbalists use 100 proof (50%) vodka and have success, even with fresh herbs. I prefer to use a higher proof for fresh. Using 100 proof (50%) vodka for *dried* herbs is certainly okay, though more complicated formulas are used by professional herbalists.  Keep in mind that some herbs require glycerin at about 10%, including milk thistle seed.

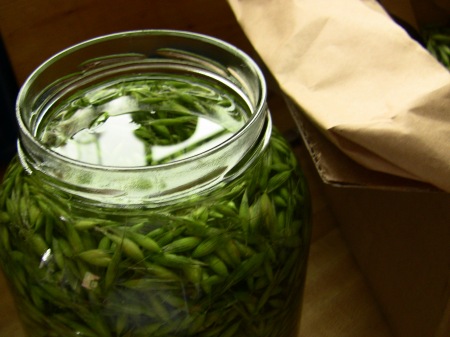
So, you pour the alcohol over the herbs and fill the jar to the top. Leave about 1/2 – 1 inch between the alcohol and the rim of the jar. Try to make sure all of the herbs are under the liquid.

tinctured oat tops
Step 4:

Use a chopstick or spoon to press the herb down and stir in order to release any air bubbles that may be trapped in the jar.

Step 5:

Cap the jar. I often like to put a piece of wax paper between the rim and lid so that the lid doesn’t ‘stick’ to the jar. It’s not that this is really a problem, because you can run it under hot water, but it just makes it easier.

Step 6:

Label the jar with the herb, date, and percentage of alcohol. Store in a cool/dark place and allow to do its tincturing  magic for 4 – 6 weeks. You can really leave it for longer if you don’t get to it in that time frame.  I have left herbs in 180 proof alcohol for a *year* and it doesn’t go bad because of the high alcohol content. Sometimes I do up to 3 gallons at a time, so I don’t always decant everything right away!

Step 7:

When you decant, strain the herbs out and compost them after squeezing the alcohol out of them. You can wring out the herbs with a thin, clean dishcloth or cheesecloth. There are also professional herb presses that are available for just this purpose. The herbs will often become quite dessicated, actually, so sometimes it is incredibly easy to extract as much alcohol as you are going to!

Be sure to label your decanted tinctures with the Date and the Herb, as well as the alcohol used. Keep in mind that the % of alcohol is no longer 95%!!! Though it’s not easy to exactly determine, it’s probably closer to 50%, depending on the herb used.

Resources:

Gladstar, Rosemary, Herbal Healing for Women, 1993.
Weed, Susun, Healing Wise, 1989.
Tierra, Michael, The Way of Herbs 1998
Hoffman, David, Medical Herbalism, 2003.
Tilgner, Sharol, Herbal Medicine, 1999.

Good luck with your first tincture. Feel free to comment below if you have questions!
My tinctures can be found on my Etsy site.


Use fresh mint for perfect skin care

March 8, 2011

mint leaves
It may be March, but I’m already thinking about mints. Fortunately, some of the herbs you may have brought inside for winter (or the herbs that may make early spring appearances) are wonderful for all manner of skin care concoctions. I don’t bring mint inside but as a vigorous perennial, it begins to show its minty face fairly early in the growing season.

Mint (mentha), whether one is referring to peppermint, spearmint, apple mint, pineapple mint, lemon balm, or any other variety, is a stimulating herb that is well known for its internal benefits (as a great digestive tonic and cure for indigestion, for example). But have you yet tried it externally in a skin care ritual?

For identification purposes, you can always recognize a mint by its square stem, though mints such as peppermint and spearmint are best known for their potent volatile, or essential, oils.  Mint’s delightful aroma makes it even more appealing to use as a skin care treatment, because it provides some aromatherapy, stimulating & clearing the mind. In skin care, mint is used as a deodorizer, cleanser, and skin soother. The toner below is particularly grand for oily/acne-prone skin because the citrus peels are marvelously anti-septic and ideal for further astringing the skin.

Rule of thumb: Dried mint 1 Tbsp = 3 Tbsp Fresh.

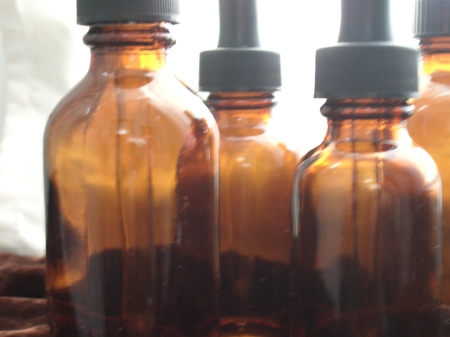
glass toner bottles

Citrus Mint Toner
3 Tbsp fresh mint leaves (lemon balm would be quite wonderful!)
peel from 1 orange
Peel from 1/2 lemon (Meyer lemons are really lovely)
Peel from 1/3 grapefruit
1 cup boiling water
1 Tbsp witch hazel extract or 1/2 cup witch hazel distillate.

1. Place mint leaves in a bowl and bruise with a spoon in order to release their volatile oils.
2. Add citrus peels.
3. Pour boiling water over leaves and peel and allow to cool completely
4. Strain to remove solids.
5. Add witch hazel extract (tincture) or distillate.
6. Pour into a clean container

*NOTE: as an unpreserved toner, this is essentially a “fresh” product that must be kept refrigerated and used up in a week or so. Don’t store it in your warm bathroom! Also makes a wonderfully refreshing facial mist for a pick-me-up any time of day.


The Healing Power of Herbs: Liniments

November 17, 2010

Oil with herbs Liniments. Hm. Sounds vaguely medicinal, right? I remember once going to a bar that was ‘inspired’, I take it, by herbal formulas. Some drinks (shall I say ‘concoctions’?) boasted the inclusion of herbal tinctures of elderflower, ginger, or lavender. Not a bad thought at all, as we often use more familiar alcohol extracts of vanilla or orange peel in herby libations. However, there was a drink that supposedly included the use of an herbal liniment…..HA HA HA HA. Well, that’s the herb snob in me, I’m a little ashamed to admit. Why? Because liniments are for external treatment, not for cocktails. In fact, many liniments use rubbing alcohol as a base which sounds downright raunchy as an addition to an evening beverage. In truth, a liniment could essentially be made the same way as an extract meant to be taken internally, despite the fact that the definition implies that it is used externally. It can also be made as an infused oil, which, if made with the right kind of oil, can be a fabulous culinary addition! Still, I feel some “nameology” needs to be in order.

Moving on.  A liniment is most often made as an alcohol extract. The purpose is to provide a vehicle for the important chemical compounds in herbs that would be used for external application. I have included a DIY recipe below for a ginger liniment that is made with a neutral oil, and some additional possibilities are olive oil, safflower oil, or sunflower seed oil. Essentially an infused oil, this ginger liniment works great as a massage oil post-exercise to relieve aches & pains. It is also a great treatment to increase circulation. Try on arthritic joints, on sore muscles, and troublesome joint pain. Best used twice a day at least!

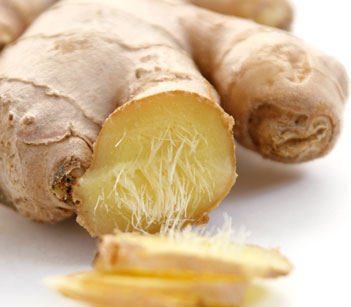
gingerDIY RECIPE : Ginger Liniment

3″ piece fresh ginger
1/4 cup almond oil

Grate ginger and combine with oil in a non-reactive (non-aluminum) saucepan. Cover and heat on low heat for one hour. Make sure you have this at the lowest possible temperature to avoid the oil overheating or ‘burning’. Remove from heat and steep for another hour. Strain out ginger. Pour oil into a 4 oz colored glass bottle with a tight-fitting screwtop.

Alternative: Use 1/4 cup grain alcohol instead of oil. Infuse for a minimum of 6 weeks (without heat) in a dark place. Apply externally with a cotton pad to relieve aches and pains. Do not apply on broken skin.

NOTE: whenever applying an external remedy, do a test patch first to make sure you are not allergic to any of the ingredients. Apply a small amount on the inside of your arm and wait 24 hours to make sure you won’t have any reaction. Some minor redness can be a natural side effect of a ginger liniment, as increased blood circulation may bring blood flow to the surface of the skin.


DIY: Fragrant oils to condition and nourish your hair

May 4, 2010

Herbal Hair Oil Over the years, when I would hear about a hair oil or see a recipe for one, the association was usually with a hair treatment oil that would be used for a deep conditioning application for dry or damaged hair. This kind of hair oil treatment can be a great benefit to hair, because the oils penetrate and revitalize extra dry locks to great effect. Because my hair is on the oily side to begin with, I knew that a hair oil treatment of this kind is not something I would necessarily need. Plenty of lubrication there! I prefer using herbal hair rinses to reduce oil production and increase lustre and shine.

That said, when perusing Colleen Dodt’s Essential Oils Book a few years ago, I came across what was, for me, a novel concept. Dodt advocated the use of a blend of fragrant essential oils in a carrier oil base that are put in a dropper bottle, applied to a wooden comb, rubbed into the wood, and then combed into the hair.

The result? Hair that smells really, really beautifully — delicately scented, aromatic, and provides a halo of natural fragrance wherever you go. She likes to use it to banish smoke when leaving a smokey environment and carries a tiny bottle in her purse at all times. I just love the concept and often apply it to dry hair in the morning or evening before going out. My hair is actually on the oilier side, and this kind of application needn’t aggravate oily hair at all. You are basically just –very lightly — applying a nourishing hair conditioner that contains essential oils actually beneficial to the hair itself.  There are definitely hair oil treatments that can be applied for deep conditioning for drier hair types, but this fragrant application does not fit into that category.

Aromatic Hair Care Oil

Start with 1/2  oz. of base carrier oil, such as jojoba oil. Be sure to use only pure essential oils, not synthetic fragrance oils. You can add to a comb or brush as described below and comb into dry hair OR you can add a few drops to your scalp, especially if you have a dry scalp, when hair is wet and allow essential oils to add conditioning fragrance to your hair as it dries.

Try any of the following blends, as your needs dictate:

Soothing Scalp Refreshment Blend: 2 drops rosemary, 2 drops lavender, 2 drops clary sage, 2 drops jasmine absolute
Fragrant Garden Blend: 2 drops lavender, 2 drops rose geranium, 2 drops ylang ylang, 2 drops patchouli
Conditioning Blend: 2 drops Roman chamomile, 2 drops lavender, 2 drops sandalwood, 1 drop jasmine absolute
Earth Blend: 2 drops rose absolute, 2 drops patchouli, 2 drops sandalwood, 2 drops lavender
Healing Scalp (anti-dandruff) Blend: 2 drops cedarwood, 2 drops lavender, 2 drops rosemary, 2 drops tea tree.

Directions:
1. Fill a 1/2 oz. dark glass dropper bottle with the carrier oil and essential oils.
2. Add 2-3 drops of hair care oils directly onto a hair brush or comb before using. If you have a wooden comb, the oil can be rubbed directly onto the comb. The oil conditions the hair as you brush or comb.
REF: Colleen K. Dodt, The Essential Oils Book: Creating Personal Blends for Mind & Body, MA: Storey Publishing, 1996.


Making Infused Honey with Household Spices & Herbs

March 26, 2010

cinnamon infused in honey I wrote this DIY post for a local group of handmade artisans here in Philadelphia, for the Handmade Philly blog. But what could be a better project for my own readers than herb-infused honey, using readily available sprices from your kitchen cabinet and herbs fresh from the garden? Pop on over the Handmade Philly and check out the post.


Keep yourself warmed with Herb & Tea infused Milk

March 11, 2010

Warm milk While the cool weather lingers, here in the early months of Spring, out comes the milk pot. I adore my Swiss-made red-enameled milk pot. To me, it means steaming hot frothy milky beverages that when poured, will not result in a milky mess all over the stove top or counter. To my daughter Maeve, Mr. Milk Pot means “vanilla milk”, “cinnamon milk”, “honey milk”, or “hot chockie”. To me, it means any number of milky beverages. Let me give you an example. Back in January, I made a fresh batch of organic lavender infused organic honey for ecoknits, a wonderful etsian who makes the most adorable little hats. Anyway, at the end of the process, I was left with a mass of organic lavender buds soaked in the most lovely clover honey you’ve ever tasted. My thought? Mmmm..this would be good in warm milk. I thought, why not throw in some organic fair trade earl grey tea while I’m at it? So I did. I let the milk come up to a near-boil (but not), called “scalded milk”. You can tell when it’s right because you see this hint of frothiness around the edges of the pot and the milk has not yet come to a simmer/boil.

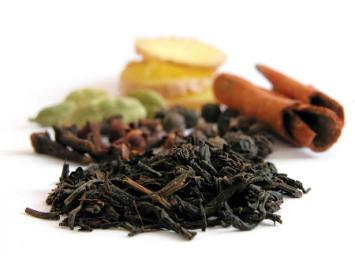
Masala Chai Tea Some tea shops, such as Infusion, an independent coffee shop in Mt. Airy (Philadelphia) has been making tea-infused milk drinks, called cambrics, for years. Other places have more recently introduced the tea latte, an infusion of tea in water, made extra strong and topped with lots of steamed milk (i.e. frothiness at its best). I love steamed milk. (I’m a steamed milk nazi because I worked at a coffee shop in Dublin for three months and was forced to master the skill, but that’s another story. I digress.)  The ones who own the origin of the true tea latte are the ancient Indians, I guess, as milk is considered to be a perfect food in India. “Masala Chai tea“, or what I think of as “yogi tea” is a blend of black tea and energetically warming, aromatic spices such as cardamom, cloves, cinnamon, ginger root, and pepper traditionally infused (via heating to a near simmer or simmer) in milk and water for a warming, soothing drink. Other possible additions include saffron, nutmeg, and even rose petals, depending on the region of India. That said, you can experiment with this concept. Lavender and black tea or earl grey (bergamot-flavored) tea are sublime with milk, as is black currant flavored tea. One of my favorite tea blends is my “Sunrise Sunset“, which includes red rooibos ‘tea’ (an herb, really), rose petals, hibsicus, cloves, cinnamon, and a touch of orange peel, an herbal tisane which is superb when prepared with warm milk and honey. I also love herbal root blends prepared with a mixture of water and milk, such as my Ishtar tea (shatavari root, ashwaghanda root, dandelion root, burdock root, and cinnamon bark), or even just a mixture of Shatavari root and cinnamon bark. It is a nourishing, vata-clearing tonic that is so very nourishing to the spirit as well.

I am sure my readers will come up with all kinds of beautifully creative ways to infuse milk and create lovely winter treats for both themselves and their children. I want to hear about them! In the meantime, you can start with my lavender and black tea milk (and keep in mind that you can infuse the milk you use to make chocolate pudding, cream of wheat, oatmeal…you name it!). If you use tea leaves or herbs in your milk, you will need to use a fine mesh strainer to strain out the organic material from the milk as you pour into your mug. In the photos for this post, I just used cinnamon sticks and honey in the milk, so a strainer wasn’t really necessary.

cinnamon added to milk over the stove

honey added to warm milk

warm milk being poured into a mug

RECIPE: Lavender & Black Tea Infused Milk
1 tsp lavender blossoms
1 Tbsp. black tea (darjeeling, english breakfast, earl grey)
1.5 cups whole milk

Put all of the above in a milk pot or small saucepan and starting at medium heat, bring slowly to warmth, removing from heat before boiling/simmering. You will see a softening, frothiness around the edge of the milk, and a gentle steam will be rising from the milk. Add honey if desired!
Want to know more about my thoughts on milk nutritionally? Read on. If not, stick to the recipe above and enjoy!

Myth: Saturated fat clogs arteries (i.e., “whole milk is bad”)
Truth: the fatty acids found in artery clogs are mostly unsaturated (74%) of which 41% are polyunsaturated (Lancet 1994 344:1195)

Sally Fallon is an important figure in the Weston Price Foundation, a non-profit organization that advocates the nutritional (dare I say, evidenced-based) philosophy of Weston A. Price, who wrote a fabulous book called Nutrition and Physical Degeneration, which chronicalled his research among various cultural groups in the 1930’s whose diets were still ‘untainted’ by modern foods such as jams, jellies, white (refined) flours and sugars. He discovered that the facial (skeletal) structures, dentition, physical health remained superior generation and generation only when individuals consume nutrient-dense whole foods and fat-soluble activators found exclusively in animal fats. Physical degeneration would appear in only one generation once modern foods were introduced to a cultural group. Sally Fallon,  the president of the foundation, wrote a wonderful cookbook called Nourishing Traditions, which outlines much of the nutritional basis of what the Weston Price Foundation advocates for through research, education, and activism. Much of the nutrional ‘message’ is quite opposite to what most dieticians preach, though much of this (peer-reviewed, scientific) research is beginning to gain ground in the public eye. Namely, that saturated fats and cholesterol rich foods are not at all the enemies they are made out to be, and are, in fact, vital to a healthy diet. All of this is to say…sigh…that whole milk is good. (P.S. And FYI …soy milk…not so good.)

tea strainerRaw Milk Warmer Sally Fallon, Nourishing Traditions
(2 cups)
1 1/2 cups raw milk
2 Tbsp carob powder
2-4 Tbsp maple syrup OR 1/4 tsp stevia powder
1 tsp vanilla extract
1 tsp chocolate extract
1-2 Tbsp nutritional yeast flakes

Place all ingredients in a glass container and mix well with a wire whisk. Place in a pan of simmering water and stir occasionally until the mixture becomes warm. Do not overheat!

Raw milk is another story, as is the story of cultured milk products and their benefits to one’s health. What are your thoughts about milk?
Fabulous Chai recipes you can make yourself

February 16, 2010

Chai Tea Spices

Chai Tea Spices (courtesy of Herb Companion)

I love chai tea, as many of you already know. I am also a bit partial to Herb Companion, a fun herby magazine that is always a welcome arrival in my post box. It’s trustworthy in terms of information and sources, and I’m honored to be an occasional guest blogger, something I wish I had time to do more often! In any case, I’m often tempted to share bits and pieces from Herb Companion with you, and their January edition was no edition. In these cold winter months, there is nothing more pleasurable than lovely Chai Tea blends. Check out Herb Companion’s recipes for various chai blends below, including one that uses Holy Basil, my personal herb choice for 2010. There may be some surprises in the recipes below, depending on the regional variations of Chai. Kashmiri chai, for instance, includes blanched almonds and saffron, something you certainly won’t get at Starbucks. Traditional Chai Teas almost always involve simmering the tea & spices in both water and milk, producing a nourishing wintertime beverage that is as warming to the soul as it is to the tummy.

My Chai (Yogi) Tea

My Chai (Yogi) Tea

RECIPES:

Black Chai Tea

Green Chai Tea

Tulsi (Holy Basil) Chai Tea


Calm Child Formula: a recipe to calm the little ones

January 22, 2010

I currently study herbal medicine under the tutelage of Michael and Leslie Tierra and their East West School of Planetary Herbology. My focus in much of my work in herbal medicine has been maternal and child health, which you may note from many of my posts. One of the things I love about the world of herbal medicine is that the masters — our masters in this current time — are always intersecting in one way or another. The most respected herbalists of the United States are usually connected to the American Herbalists Guild (AHG), the closest thing to a regulating body that we have. It’s not easy to get AHG after your name, either!

I was looking through Naturally Healthy Babies and Children, a great resource by Dr. Aviva Jill Romm, mostly in thoughts of preparing for a course I have been dreaming about since last spring — and nodded to in a earlier post — and I came across this wonderful formula for a “Calm Child Formula“. Aviva Romm writes about it. Michael Tierra came up with it. And probably hundreds of children have been happily subjected to its calming effects. How wonderful to have a formula sanctioned by our modern masters and certainly born of a long herbal tradition of empirical evidence and experience.

The formula is a nervine, which means it has a calming effect on the nervous system, and digestive calmer, helping to bring a sense of tranquility to a child, even during times of sickness. It can be used as a tonic for active children or even during long car trips. Tierra’s company, Planetary Herbs, sells it in their formulas, or you can prepare it at home as a water-infusion or a syrup. (Ref: Romm 2003) The recipe below is for a syrup. An alternative way to make  a syrup would be to use all the same herbs and to prepare it as I describe in this post for the Herb Companion last year.

chamomile

chamomile

Calm Child Formula

1 oz. catnip tincture
1 oz. chamomile tincture
1 oz. lemon balm tincture (fresh lemon balm is superior)
1 oz. valerian root tincture (stinky!)
1/2 oz. lady’s slipper tincture
1/2 oz. hawthorn tincture
1/2 oz. vegetable glycerin

To Prepare: Combine all ingredients in a dark amber jar.
To Use: Dosage is 1/2 to 1 tsp as needed. Shake well before using.

REF: Aviva Jill Romm (2003) Naturally Healthy Babies and Children: A commonsense guide to Herbal Remedies, Nutrition, and Health. Berkeley: Ten Speed Press