Home Spa: Beauty Blossom Facial Part II

March 25, 2009

facial_mask_4 Part II:  The All-Important Facial Mask

Ah yes, the facial mask. Quite possibly the most intantly transformative part of your home facial. Facial masks should be applied to a very clean face and are wonderful when preceeded by an herbal facial steam, such as that outlined in Part I. Clay masks have been used for refining delicate facial tissue for ages, as it serves to detoxify, smooth, reduce the appearance of pores, and balance facial tone, including the reduction of redness and even flakiness.

What you need here are 1) good quality facial clay, and 2) botanicals that will help address any facial issues you might have. Below, I will help you in this process by giving you a sample structure for creating your own simple facial mask, depending on your skin type.

Facial Clays:
Cosmetic clays of different varieties are quarried from mines all over the world. Some examples of facial clays are French green clay, Moroccan Rhassoul red clay, Fuller’s Earth clay, Dead Sea clay, Bentonite clay, and Kaolin (white) clay. Having good quality clay is important, as you don’t want a mask that is filled out with lesser quality ingredients, and different clays can provide a different outcomes. Good sources for fine clays include Mountain Rose Herbs, Essential Wholesale, and From Nature with Love. In the following paragraphs, I’ll talk about two good quality, often used, and highly effective facial clays: French Green Clay and Moroccan Rhassoul red clay.

Fench green clay is heavily used in the cosmetic industry as a facial clay, but that said, it is difficult to get significant quantities of any effective clay in over-the-counter facial masks. You are better off making your own, purchasing masks from a reputable, quality-driven seller (a-hem), or attending a good spa for a professional facial. If a clay is purchased already ‘wet’, it must be used quickly once opened or is subject to mold or bacteria growth. It is for this reason that I sell my facial clay & herb masks as powders.  This way, we can avoid high levels of preservatives in a facial treatment, and you can also control your ‘wetting agent’ to better suit your skin type.

French green clay is a great clay for all skin types, but you might want to mix it with French white (Kaolin) clay if you have sensitive skin, as it is a ‘strong’ clay, in terms of its drawing power. A wonderful detoxifier for the skin, green clay draws out impurities, toxins, and pollutants from the skin, all the while tightening pores and smoothing the facial tissue. This drawing action also serves to stimulate circulation, bringing blood to the surface of thes skin and thus, revitalizing and ‘awakening’ facial tissue. French green clay is also rich in minerals and nutrients, and thus adds additional skin nourishing power to a facial application. Try using this clay with some of the herbs or fruits for normal to oily skin below to help balance oily skin and treat acne issues.
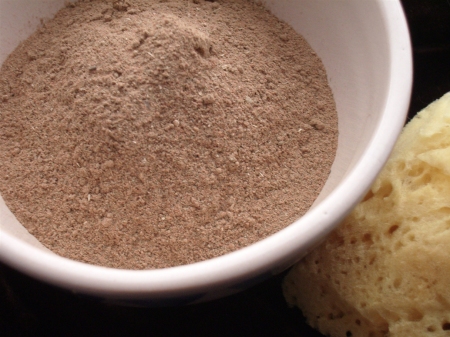
ayurv_mask2Moroccan Rhassoul red clay:
Drawn from below the Atlas mountains in Morocco, rhassoul clay is a centuries old, but also a newly popular facial clay with Western spas. This fine, red clay has wonderful skin-balancing properties. It is suited for all skin types, but especially loved among those with mature, dry, and/or sensitive skin. It acts as a gentle exfolliant but is also rich in minerals such as Silica, Magnesium, Iron, Calcium, Potassium and Sodium. Clinical studies have found (www.irsi.org) that rhassoul clay reduces dryness (79%), reduces flakiness (41%), improves skin clarity (68%), improves skin elasticity and firmness (24%), and improves skin texture (106%). I am not even sure how 106% is even possible, but this clay definately does good work! My own Moroccan Rhassoul mask incorporates healing myrrh, the humectant honey, oat starch, and mineral-rich dead sea salts for a nutrient-rich powerhouse that has moisturizing, healing, and soothing properties on top of the clay’s detoxifying properties.

Herbal, Vegetable, or fruit additions for various skin types:
1) Normal to Dry ~ irish moss, chamomile, apple, oranges, avocado, pear, melon
2) Normal to average or combination skin~ lavender, rose petals, chamomile, tangerine, carrot, peppermint, banana, peach, zucchini
3) Normal to oily skin~ kelp, lemongrass, lemon peel, orange peel, cherry, strawberry, peach, apricot, tomato
4) Troubled skin in need of healing~comfrey root, calendula blossoms, lavender, chamomile, holy basil, red sandalwood, myrrh, neem

Other helpful additives:
Oatmeal (soothing, softening, moisturizing), Honey (antibacterial, humectant, hydrating), Rosehips (exfoliant), Apricot Kernal meal (exfoliant), Yoghurt powder (nutrients, moisturizing, smoothing), Buttermilk powder or Milk powder (nutrients, moisturizing, smoothing), Dead sea salts (minerals, exfoliant), Vinegar (pH balancing, antiseptic), coffee grounds (exfoliant) 

Wetting Agents:  As the facial powder will be dry, you will need to choose a ‘wetting agent’ according to the condition or needs of your skin. Of course, regular filtered or spring water can be used, but you could also choose your favorite (non-alchohol) astringent, natural cleanser, or heavy cream, milk, or yoghurt for more moisturizing effect. Botanical hydrosols, or distillates, are the water by-product of steam distillation, when the essential oil is extracted from a plant. Some distillers work specifically to produce incredibly good quality distillates that can also be used for aromatherapeutic use because the hydrosol retains many of the same beneficial properties as the essential oil or indeed, the plant itself. Hydrosols or pure aloe vera are my favorite choices for facial mask applications.

blue_bottle_2oz_2
Aloe Vera gel is a fabulous wetting agent, but be sure to get the good stuff! You want the natural, liquid type of gel that is also drinkable (though not the kind sold as a kind of pop drink in Asian countries). Aloe is a bit ‘drying’ and also tonifying, so it’s great for oily skin, in addition to its well-known skin healing properties.

Rose Distillate or Hydrosol is another wonderful wetting agent that has age-old tonifying properties, also blessed with a heavenly fragrance. It is also said to reduce the appearance of capillaries, and thus can be fabulous for mature and/or damaged skin. Real Bulgarian rose hydrosol is a wonderful treat to the senses with tremendous benefit to the skin.

Lavender Distillate or Hydrosol seems to be helpful for rosaccea but is also effective for all other skin types. It’s tonifying strength makes it a good choice for oily skin. It smells nice but not the same as the essential oil, so be prepared for the difference! I use this in my Lavender facial cream to address the tonifying needs of normal to oily skin types, but because it also appears to help address the needs of those with rosacea, or an inflammed, reddish, sensitive skin.

Orange Blossom (Neroli) Distillate or Hydrosol is a lovely, fragrant and very safe hyrosol. Yes, it’s tonifying, but it is also appropriate for sensitive, dry skin, as well as children! You can use this very gentle hydrosol in myriad ways. I make my Orange Rosewood facial cream, and its mate, the Orange Blossom (unscented) cream with this hydrosol because of its therapeutic effect. The Orange Blossom cream is called thus because though it is unscented, it is still gifted with the lovely, light scent of the neroli flower.

Some other hydrosols: Lemon balm (uplifting, fragrant, tonifying), Rose Geranium (gently astringent, tonifying), Sandalwood (healing, balancing), Cucumber (soothing, cooling), Chamomile (soothing, sensitive, anti-inflammatory), Witch hazel (tonifying, astringent)

NOTE: For herbs, use powdered herbs or grind them into a fine powder by using a clean coffee or spice grinder. For fruit and/or vegetable additions, you can just squeeze out the juice and add the juice to the clay to wet it, and then mix in the pulp and apply directly to the face)

Directions:
Add 1 – 2 Tbsp. facial clay
Add 1 tsp powdered herb (or herb blend)
Add 1 tsp additonal additive, such as powdered oatmeal, milk, or honey
Add wetting agent a little at a time until the powder becomes a smooth paste. Don’t add too much!

Apply to clean face, avoiding the eyes, and leave application on until it dries and becomes tight, aiming for 15-30 minutes. Use a warm, wet washcloth to gently remove mask and behold the radient glow of your refreshened skin! You may indeed experience some redness for a little while after the application, so it’s best to do this at night, before bedtime. By morning, the redness should be gone.  Facial masks should be done up to once a week, but it’s good practice to do a mask at least once a month to refresh the skin and rid it of environmental pollutants and toxins, particularly if you live in an urban environment.


Home Spa: Beauty Blossom Facial – PART I

March 18, 2009

facial_steam_loose_3Do you dream about that fabulous facial you had…oh, once upon a time? Most of us can’t afford a facial these days, especially at $50-$150 for an hour long treatment. The good news is that anyone can do an incredibly luxurious, spa quality facial in one’s own home! A facial is just what we need this time of year ~~ it will quickly revitalize skin, give you a lovely glow, tighten pores and smooth the texture of your skin. There are so many great ways to accomplish a beautiful facial and scads of recipes out there to follow. In this post I am going to give you the outline of the “perfect” facial, including Herbal Steam, Clay & Herb mask, & Simple Home Spa Toner.

Take the time and effort to do an herbal facial steam. You can check out my facial steams for drier or oiler skin types in my etsy shop, and that will give you more specifics about what different herbs will do for your skin, but I would also encourage you to put together an herbal steam from herbs you might have handy or would be able to obtain fairly easily. Try this recipe below for STEP ONE of your facial in order to open your pores, deeeeply cleanse your skin in the most gentle manner available, and allow the herbs to do their good work on your facial tissue. It’s a quiet, meditative practice and really necessitates you taking some time out just for yourself!

STEP ONE: Herbal Facial Steam.

Gather together small amounts of herbs rich in volitile oils that smell heavenly and will also greatly benefit your skin. Some examples are mints (spearmint, lemon balm), scented geraniums, chamomile, lavender, lemongrass, orange peel, or even thyme or rosemary.  Citrus-smelling herbs are often useful for oily or acne prone skin, and indespensible herbs like thyme and rosemary have some antiseptic properties and so can be additionally helpful for troubled skin. In addition, you will want to use an emollient (skin soothing) herb and a healing herb in order to balance any skin issues that may exist. Comfrey root is both emollient and healing, so this beneficial root shows up in most of my steams. You can always try a bit of licorice root (emollient) along with calendula blossoms (healing) if they are on hand.

Beauty Blossom Herbal Steam:
1. 1 tsp rose petals (aromatic, astringent)
2. 1 tsp chamomile flowers (anti-inflammatory, calming)
3. 1 tsp hybiscus (emollient)
4. 1 tsp calendula blossoms (healing)

Directions: combine herbs and place in a non-metal pot, fill with 2 cups of filtered water and bring to a simmer on the stove. Cover tightly and allow to simmer for 10-15 minutes. Remove the pot from the heat and find a comfortable spot to sit. Put your face over the steam and drape a towel over your head to trap the steam. Move your face from side to side and steam it for 10 minutes. When the water begins to cool, blow into the steam to direct it back into your face, where you can attempt to target more troubled areas. You can bring the water back to a simmer and do it again if you’d like!

A facial steam is the ideal preparation for a home spa clay & herb facial mask, which should always be applied to a very clean face. Part II of my home spa facial series will explain how to make your own facial mask at home! Stay tuned…


A word about the divine Body Polish

March 16, 2009

I’d be remiss in not at least once bringing up the pure luxury of a simple salt or sugar scrub. First of all, you don’t have to pay huge amounts of money for this kind of product, as it’s something you can easily make in your own home! That said, of courseit’s worth the $12 to buy my beautiful essential oil blended scrubs with premium dead sea salts, a diverisity of high quality therapeutic oils, and nice packaging. (I had to say that, I’m running a business) But seriously, $12 is a totally reasonable price. Many companies charge upwards of $25 or more for such a product. And again, you can do this yourself!

Salt or sugar scrubs are absolutely marvelous. There are many versions out there, some which contain soap or ‘whipped’ soap, some that are emulsified with other oils and waxes (such as my brown sugar scrub) and many that are simple combinations of salt or sugar and oils. Cheap versions –such as some chain bath & body stores that I won’t name outright–use petroleum-based oils as the primary ingredient in these products. Not helpful. The point of a body scrub is to provide exfoliation to slough off the outer dead skin sells and thus ‘polish’ the skin into a healthy, revitalized glow. Not only does this get rid of the dull outer skin cells, but it also increases circulation and invigorates the tissue. The oils then sink into the fresh layer of skin to provide nourishment, moisture, and protection from the elements. Indeed, oils not only provide SPF protection against UV rays, but the oil also acts as a natural barrier to keep the skin from getting too dry or chapped. Scrubs are great in the summer because they keep your skin glowy and fresh, and somehow, even more necessary in the winter because they keep your skin protected and well-moisturized. I find that I don’t need a moisturizer when I use a polish towards the end of a shower or bath, and my skin doesn’t get that winter itchy, dry feeling that is the norm.

For those who don’t like applying oils directly to the skin in this way or like something a bit smoother in texture, an emulsified scrubis ideal. This is a bit more high-tech to make and so it’s better purchased, but emulsified scrubs do eliminate the slippery oils that can often coat the floor of the bath tub in the former. Some people hate those oils and also find the salts a bit too harsh if they have extra sensitive skin. The oils are actually in a solid state, adhered to the fine sugar crystals, so the texture is like fine breadcrumbs. A handfull of this can really do the trick in gently exfoliating and moisturizing the skin.

So how do you make something like this at home instead of spending a lot of cash on the so-called ‘upscale’ spa version?
Well, it’s simple.
DIY – Simple Sugar or Salt Scrub.
1. Find a nice container – plastic or glass – and make sure it is clean and dry. It’s very important that you keep the container as dry as possible and try to avoid getting water in the scrub unless you intend to use it up quickly, as the introduction of water can create a potential for mold growth, especially if the scrub sits around with water in it.
2. Fill the container with salts or sugar – it doesn’t matter what kind, though an extra course texture of salt or sugar will be more ‘scratchy’. I find that the finer the texture, the better, in most cases. Leave a little of room on the top but not more than 1/2″ – 1″.
3. Add a little Vit E (squeeze out one capsule or add 1/2 tsp oil) to prevent rancidity (if you have it on hand).
4. Add the fragrance. Start with 20 – 30 drops of your favorite essential oil. I generally advise away from most fragrance oils because of the presence of pthalates and because only true essential oils offer aromatherapeutic benefit. That said, some essential oils are extremely expensive, so you might have to use a fragrance oil to get the scent you want. For true essential oils that are readily available and affordable: Try ylang  ylang for intense, heady floral notes; orange for a lovely citrus fragrance: peppermint & rosemary for something zesty and refreshing (don’t overdo the e.o.s on this); lavender for its beautiful, relaxing qualities; or patchouli for it’s earthy, sensual scent.
5. Fill the container with a skin-nutritive, natural oil or blend of oils. Jojoba, Sesame, Olive, Grape seed, or other oils, many of which you may be able to find in small quantities at your grocery store. Do NOT use mineral oil, J&J “baby oil” (How can J&J actually market this for babies?), or other petroleum-based oils, as these are equivalent to putting saran wrap on your skin. The petroleum oil creates a barrier but doesn’t provide any true moisturization or nutrition for your skin cells. It’s basically a useless oil slick, as far as I’m concerned.

Voila! Pure luxury for the bath time ritual and an absolute must for regular skin exfoliation and moisturization.
See my store for various salt scrubs, including my Ayurvedic Healing Scrub for those who suffer from skin conditions such as psoriasis.


Featured Seller – Motley Mutton

March 12, 2009

il_430xn_51570827 This is a blog about the world of herbs, botanical medicine, natural skin care, and related ingredients, is it not? Well, it’s also about green living. What does that mean, though? When I think about “green living” i am usually thinking about it from the urban standpoint of making eco-friendly choices, recycling, upcylcing, choosing sustainable practices, but just wait until you read about the etsy artisan below and the truly Green (note, capital G) life that she lives. Not only is she giving back to the earth and providing for her community by having a market garden and participating in community 4H via her children, but she is giving back to humanity by caring for so many children and by fostering new little lives at her wonderful homestead in West Virginia.

I was immediately drawn to the amazing felt craft of etsy artisan Nancy Bevins, proprietor of Motley Mutton fom the first moment I saw one of her creations. In fact, I sometimes go to her shop just for a bit of respite when I want to see some exquisitely crafted little felty animals, swinging on swings. How does she do it? I wondered. They are so skillfully created. I love to create and learn how to do new things, but sometimes I feel that it’s nice to just see what people can do with a material that is still a total mystery to me.

il_155x125_47203414 Nancy Bevins lives on a farm in West Virginia. She moved from California and with her family and built a house on an old abandoned farm. With four grown children, four more adopted from foster care and two additioanl foster children, needless to say, things have to be pretty busy in the Bevins household!  The family homeschools, raises sheep, chickens, and has large garden which enables them to sell at the local farmer’s market. The whole family pitches in and shares in the profits.

In respect to her craft, Nancy tells me, “After first moving here, we tried raising a few different animals, but then my children began raising sheep for 4H. We began using the wool for various things, but then discovered felting. Our wool isn’t the greatest, not the best for spinning, not really soft and silky, so this has been a good fit for our farm. It definately helps pay the bills, and justifies having so many “pets” around the place!

“I began selling on Ebay, but then discovered Etsy and started a regular shop there. I still sell on Ebay once in a while, and once a month I offer larger pieces at the PFATT Marketplace (Pfattmarketplace.com). I’m not crazy about custom pieces because I have so many ideas for things I’d like to make, and every time I accept custom orders I have to neglect my Etsy shop. There’s just never enough time for everything!”

il_430xn_52781977 You really ought to check out Motley Mutton …be inspired!


DIY ~ Herbal Remedies for the Cold Season Part II

March 10, 2009
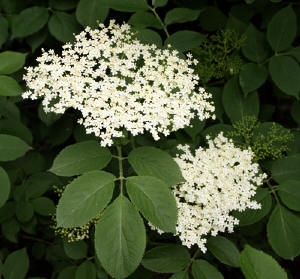
Elder Flower

Elder Flower

Ah, here I am sniffling away from a wee cold given to me by my darling 2 and a half year old, Maeve, who is all to0 glad to bring home little daycare germs to share with her family. *sniff*! Well, happily, there are lots of remedies to shorten the length of the cold, as well as to add some relief.  My Winter Spirit blend can help prevent colds but also treats those with slight fevers and benefits the immune system with high levels of nutrient-dense herbs like alfalfa and vitamin rich rosehips, a great source of in Vit C.

Again, among other preventive strategies mentioned in Part I, raw garlic always helps to banish a cold away, and broths or soupy grains made with a stock of simmered onions and garlic is always a good old wives’ remedy, with good reason! Add some ginger for an extra warming, antiviral punch. But raw garlic, steeped in olive oil and used for dipping a bit of bread, is an incredibly tasty, potent remedy.  Herbal Steams using essential oils and herbs are also a great way to add relief, and my post on that subject provides recipes in that direction.

The Best Cold Remedy Soup ever!
1. Combine 3 cups vegetable stock & 2 cups sliced onions (or two sizable onions)sliced
(Simmer the onions in the stock until tender)
2. Add: some sliced carrot & 2 Tbsp shredded fresh ginger root
(simmer for 10 min until carrot is soft)
3. Reduce heat to low and take a little bit of the stock out, whisk in 2 Tbps miso, and return to the soup. Do NOT allow the soup to return to a boil, as this will reduce the enzymic activity of the miso.

My real content of this post, however, is about making your own herbal tea blends to assist you when you have a cold. I’ll start with some of the wonderful herbs that are readily available, such as thyme leaf (antiviral, antimicrobial), elder flowers or berries (immune boosting, 2 antiviral compounds, significant relief for fevers), nettle leaf (the so-called weed that is one of the most nutritious plants available), and ginger (nearly a dozen antiviral compounds; reduces pain & fever; cough suppressant; warming).

The first recipe is for a lovely, incredibly pleasant blend that works throughout the winter months to boost your body’s ability to ward off illness, primarily by strengthening your immune system and nourishing your body:

Herbal Infusion for the Cold & Flu Season: Prevention
1 part alfalfa (nutritive)
1 part nettle (nutritive, adrenal support)
1 part rosehips (nutritive, vitamin C rich)
1/4 part cinnimon (catalyst herb that helps other herbs work ‘better’, warming)
1 part rose (spirit lifting!)
1 part thyme leaf (antiviral, antimicrobial)

Directions: combine the above and use 1 tsp – 1 Tbsp per cup of water. Steep in boiling water for 15- 30 min, strain, drink hot or cold. You can make a mason jar’s worth and just keep it in the fridge, heating it up as needed.

Herbal Remedy for that mean old Cold:
1 part thyme leaf (antiseptic, expectorant, carminative)
1/2 part dried ginger (nearly a dozen antiviral compounds; reduces pain & fever; cough suppressant; warming)
1/4 part lemon peel OR add a slice of fresh lemon to the tea (high in vit C)
1 part rosehips (vit C)
1 part elder leaf/flower (antiviral, helps treat fevers)
1 part alfalfa or nettle (nutrient rich)

Herbal Remedy for that mean old sore throat or cough:
1/4 part marhmallow root or slippery elm (demulcent, throat-coating, soothing qualities; anti-inflammatory)
1/2 part licorice root (demulcent, antiviral)
1/2 part mullein flowers/leaf (expectorant, demulcent, soothing)
1/2 part ginger root (nearly a dozen antiviral compounds; reduces pain & fever; warming)
1/2 part rosehips (vit C)
1/4 part lemon peel OR add a slice of fresh lemon (vit C)

Directions for either of the above: Combine the herbs as directed and use 1 tsp – 1 Tbsp per cup of water. Steep in boiling water for 15- 30 min, strain, drink hot or cold. You can make a mason jar’s worth and just keep it in the fridge, heating it up as needed. Keep in mind that the mucilage in the sore throat/cough tea will make the infusion more viscous. Also feel free to add a touch of herbal honey, especially a honey made with immune-boosting, antiviral herbs.

*Remember that any of these herbs made into a tea provides a valuable remedy. You don’t need to use them all! Simple ginger root and fresh lemon is most often my favorite remedy along with soups and broths. I might start the day with simple thyme & ginger and end it with a more soothing, alfalfa rich, vitamin C stocked blend. Experiment!

Watch out for my Next DIY cold & flu post: Herbal Syups , including my Herbal ‘Mucinex’ Recipe!


Therapeutic Herbal Hair Rinses ~ March special

March 4, 2009

My March special on etsy highlights the benefit of herbal hair rinses, comprised of a strong infusion of therapeutic herbs in organic cider vinegar. The rinse is diluted 1 Tbsp to 1 cup of water and used as a final rinse over cleaned hair. The reason vinegar is used is because it neutralizes the alkalinity of shampoos, helping to balance the natural pH of the scalp. It also softens and conditions the hair.

In this day and age of heavy hair processing and incredibly frequent shampooing with detergent-based products, our hair becomes stripped of its nutrients and the scalp plagued with excess oil production, dry, itchy scalp conditions, dandruff, sorborrheic dermitis, and other signs of imbalance. Basically what happens is that we strip natural oils out of our hair with the detergents and then try to put the oils back in using conditioners! The result is hair that may be dry while the scalp is oily or any other combination of hair imbalance. Part of the journey back to hair and scalp health is the use of herbal rinses. The other part is using natural herbal shampoos (homemade or made by small herbal crafters), but you have to be willing to accept the very different feel of a natural shampoo, which often does not have the chemical lather created by Sodium Laurel Sulfate and similar ingredients.

An herbal cider vinegar infusion can be made or the herbs can be steeped in water and used over several days. This water infusion can be stored in the refrigerator for 3 or 4 days to prolong freshness. In the case of a water infusion, you would not need to dilute.

Herbs can also be used to lighten or darken hair, additionally benefiting by providing luster and shine. Here are some DIY Recipes!

Conditioning Rinse for Dark Hair (using all dried herbs)
1 Tbsp Rosemary
1 Tbsp Nettle
1 Tbsp Cloves
1 Tbsp Cassia Chip (cinnamon chip)

Conditioning Rinse for Light Hair (using all dried herbs)
2 Tbsp chamomile
1 Tbsp orange peel
1 Tbsp calendula blossoms
1 Tbsp mullein flowers (if you can get them! these can be fresh)

Directions: Mix herbs together. Put in a covered non-metal pot with 1-2 cups of water. Cover and bring to a boil, lower the heat and simmer for 5-10 min. Strain. Add 1 cup cool water to the infusion. Now pour this strained infusion over your clean, wet hair, catching excess if you can to repour over your head, all the while rubbing into your scalp. You need not rinse with clean water, but you can if you wish. Let your hair air dry.

Check out my etsy shop: Lilith’s Apothecary for Therapeutic & Deep Cleansing organic cider rinses.